Template Business PSD, Excel, Word, PDF

8+ Resignation Letter Template Sample and the Important Elements

Consulting the appropriate resignation letter template can give you a nice reputation. Even when you decide to leave the company, you can leave your reputation intact and in a positive vibe. Unfortunately, not many people have done this right – leaving the company elegantly – which can leave a bitter taste and resentment. Just because you decide to quit, it doesn’t mean that you should leave everything in a negative manner. And knowing how to compose the resignation letter properly is the key to keep your reputation intact.

Understanding the Resignation Letter

A resignation letter is the formal written document that informs the company that you are leaving. When done properly, the right letter can help you maintain a positive reputation as well as relationship with your previous employer. The right resignation letter can leave you the positive and strong impression. It gives everyone positive vibes – it gives you positive flair while maintaining the positive relation with the company. No hard feeling, indeed.

When you are working in a company, it is crucial to notify them that you are leaving – and not in a short notice. When you suddenly and abruptly leave, it will create problems to the human resources and co-workers. It will definitely create a negative feeling and also effect. Moreover, submitting the resignation letter can maintain your dignity. You don’t know when you are going to need a reference or recommendation from the previous employer, so just maintain a positive attitude.

Composing the Resignation Letter

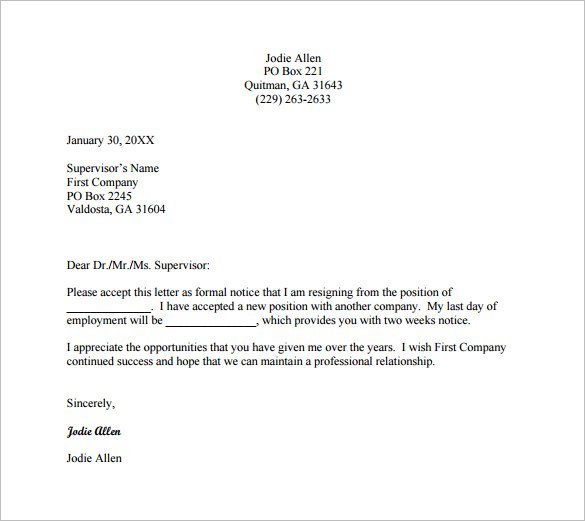
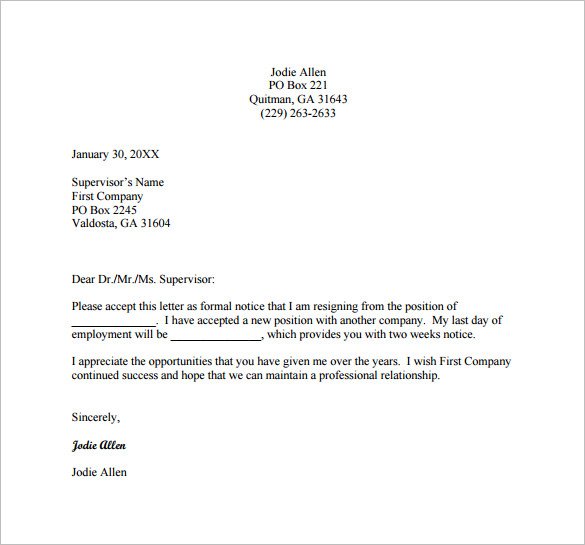
Not many people are familiar with the right construction and structure of the resignation letter, so it is only logical to make use of the already provided resignation letter template to create your own letter. With the already provided construction, you only need to fill in the information and provide the contents as your heart desires.

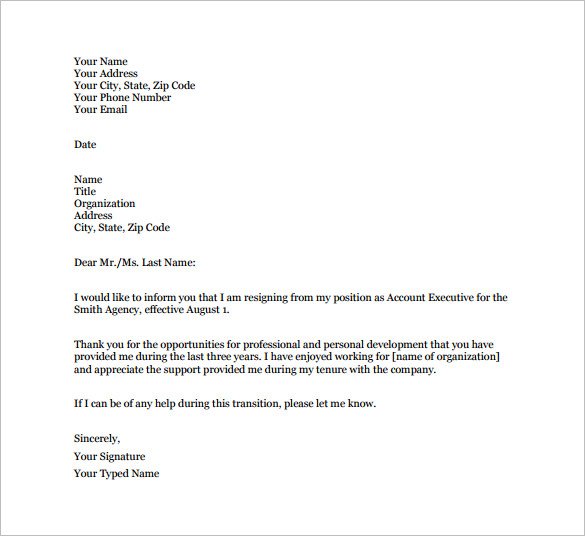
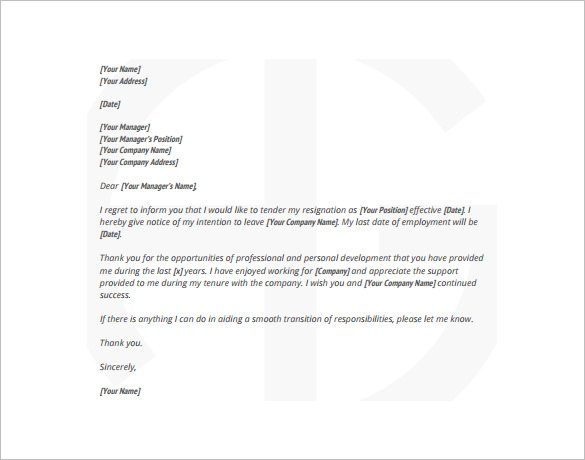
So, what are the elements you will find in the resignation letter template?

  • Date of the letter being submitted
  • The employee’s name, address, and contact info
  • The employer’s name, position, company, company’s address
  • Salutation
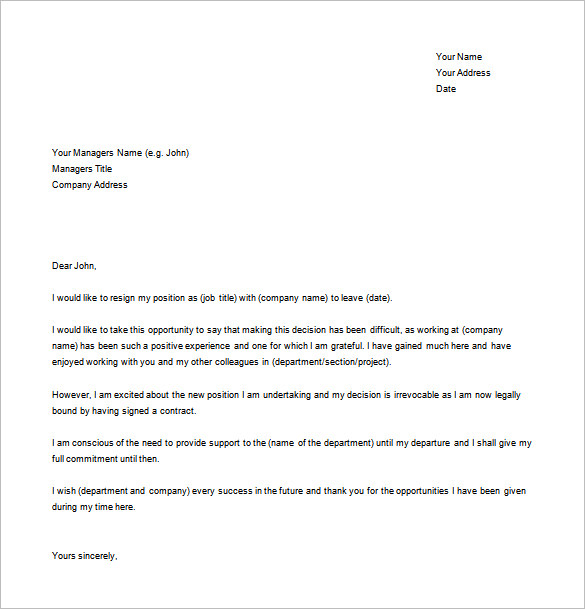
  • The announcement to leave the position
  • The words of gratitude for the working opportunity
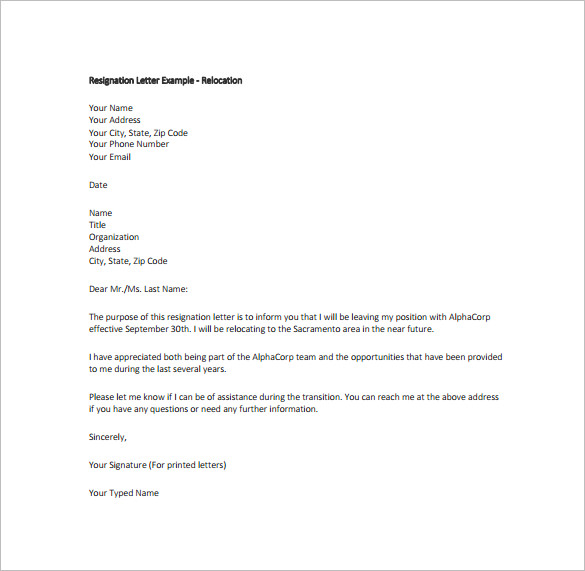
  • The reason to leave the current position
  • The offer to help with the transition
  • Greetings
  • Signature
  • The employee’s name

The Information within the Letter

When you are writing a resignation letter, keep these things in mind:

  • Provide the information of your last working days or details.
  • Put yourself in the reader’s shoes. When you receive such a letter, what kind of information do you want to get?
  • Don’t forget to thank your employer about the opportunity for working there and also offer them to help make the transition easier.
  • Mention how you can help with the transition – whether you will complete your responsibility or you will help train the new worker, etc
  • You want to say good-bye in a positive way so the letter shouldn’t include critics or complaints. Leave peacefully and don’t leave any tarnished reputation.


In the end, you should remember that it is always appropriate to say good-bye because you are joining the company in a peaceful manner – keep it that way. Consult the resignation letter template to help you with the letter.

5+ Interview Follow up Email Template Importance

Not many people know that they can send the interview follow up email if they haven’t heard from the interviewer. In the professional world, such a thing is possible as long as you have positive email and polite words. Most people probably think that sending such an email is offensive. In reality, though, you can actually show your professional attitude and expand your network at the same time. If you do it right, you will be remembered. And if your time isn’t now, it is a sure thing that you may get another chance later.

About the Interview Follow up Letter

So you have just been interviewed and you felt that everything was going quite well. But you have waited for more than a week and you haven’t heard anything from the interviewer. This is the time for you to send the interview follow up email or letter, asking for confirmation about the result of the interview – and about your chances of being hired.

There are some reasons why you SHOULD send the letter:

  • You will have a kind of closure – a peace of mind. When everything is unsure and hazy, it is easy to assume a lot of things, especially the negative ones. Instead of having negative thoughts in your head or overanalyzing what you should have done (and shouldn’t have done), it would be best to simply ask for the confirmation.
  • You can ‘remind’ them of your potential and why it would be best (for them) to hire you. If you are able to compose the letter elegantly and in a respectful way, trust me – they will respect you and honor you.
  • It gives you closure. Once everything is confirmed, you can move on with your life. Even if you aren’t hired, you can always leave it behind and move forward.

How to Compose the Letter

There are some ways for you to compose the interview follow up email. It can be short or long, depending on your preference. But avoid using too long words that may bore the reader. If you are sending the short letter:

  • Don’t forget to mention the job or position in the first paragraph and also your gratitude for the interview
  • Mention the company’s name and also the conversation point. For instance, you can mention how the company is well-known for their marketing experience and relate it to your own interest and experience.
  • In the last paragraph, you can invite them for additional questions. Close it off with the statement that you are waiting for their response.
  • Sign the letter, and include your name and also contact person underneath the signature


If you are sending the long letter, the construction is almost the same:

  • Express your gratitude for the interview in the first paragraph. Don’t forget to mention your interest in the company and also the job
  • Mention the interest from the interview and expand it. Relate it to your experience.
  • On the third paragraph, mention why you are different from the other candidates
  • On the final paragraph, ‘remind’ them of your quality
  • Sign the letter, followed by your name and contact information

That’s how you compose the entire structure of interview follow up email

7+ Heart Vector Template How to Creation

Not many people would realize the attractive appeal of the heart vector in the artistic industry. You probably have seen heart background or heart frame on the card, banner, or pamphlet. But do you know how the background is originated? How do you make the hearts and what steps should you go through?

About the Heart Vector

There are some things to know about the heart vector template. First of all, you can have the already designed and ready creation. It means that your heart background is likely to have its own color and the design is already. All you have to do is to download, save, or use it for any project or activity that you like.

The second one is the half-raw one. It means that your heart template is already set but it isn’t complete just yet. It may be blank (without any color) and the design is still raw so you need to tweak it a bit to create an appealing outcome.

A lot of people may prefer using the already set design – it saves them from the hassle. If you have the software or program, tweaking or designing everything may not be too difficult. The problem is, not everyone has the software. And not everyone is able to operate the software even if they have one. This is one of the major reasons why people would choose the template than create their own design.

How to Create the Heart Vector

You can always create an appealing heart vector from the basic circle. Of course, you can always make use of the template, but some people prefer making the heart on their own. If you are included in the latter category, here are the stages:

  • You should start with the tool Ellip L. Draw two circles. If you want to get the identical circle shape, simply copy the first circle and then paste it to create the second one.
  • Make sure that the two circles are aligned perfectly
  • Choose both circles while pressing the expand button (and also the Alt button at the same time). Your two circles will join together.
  • Choose the direct selection tool and click on the bottom indentation
  • While choosing the middle node, press Shift while bringing it down to create the bottom shape of a heart.
  • All you have to do now is to adjust the shape close at the bottom. Delete the two anchoring points
  • Now you only need to make adjustments to the angles. There should be 4 anchor points: on the left side, the right side, and the two points at the pointy bottom
  • If you do it right, you have the perfectly shaped heart!
  • Fill it up with any color that you like.


Outlining Problem

If you have problems with making the outline, it would be best to use the templates. After all, they are available – mostly for free. And they are already coming with appealing and attractive designs. The combination of appealing style and easy save (or download), you can always use the heart vector templates anytime that you want.


8+ Metric Conversion Table Template, a Simple Item often Underestimated

Not everyone would be thinking about having the metric conversion table at home, but if you are quite active in the kitchen, having the templates can be quite a help. If you don’t work in the chemical industry or any related field that deals with numbers or conversion so much, then you won’t need the table at all. However, if you will need to converse a lot of things, the table will help. After all, they are coming in different tables, models, and charts – dedicated to calculate and tackle different kinds of numbers.

The Use of Metric Conversion Table

So, why would you need the metric conversion table, anyway? Imagine this: you have been spending your time in the kitchen figuring out the right recipe for your brownies. You don’t have a scale and the measurement of the recipe confuses you. You need 100 gram of flour. How much is that in a cup? How much is that with the tablespoon? This is when the table would be coming in handy.

With the table, you can get the right guidance. For instance, an ounce is equal to 28 grams. A cup of flour is equal to 120 grams, so you know how much you need in a cup for 100 gramds of flour. The table comes in various modes. There are tables for weight, for the liquid, and other non-liquid matters. You probably think that these tables aren’t important but wait until you can get your hands on them – they can be pretty useful.

Making Use of the Calculator

Besides the traditional and regular table, you can always use the online calculator. For some people, this calculator is more efficient. These are the things you need to do to access the calculator:

  • Simply access the website or any reliable source for the calculation
  • Follow the given direction
  • Fill in whatever numbers you want on the outcome that you want.
  • Press the button Convert and you are done!
  • You will be presented with the result in no time

Despite the effective and fast methods, a lot of people prefer the traditional table than the digital calculator. Not everyone is technology savvy and some people think that accessing the website is too much hassle than the traditional table. That’s why they prefer printing the metric conversion table template than accessing the digital method.

Accessing the Reliable Source

If you want to make use of the best from the table, here are some of the things that you should do:

  • Make sure that you get a direct access to the reliable and trusted source. It would be best if you can get a reference or recommendation from people you trust.
  • Check the source. Do they have the templates that you want? Do they have the complete collections?
  • Check the rules or conditions. Is it easy to download the template? Can you manage the saving method? Do they have flexible arrangement?

The choice to make use of the available templates is definitely up to you. Just make sure that you know what you are going to do with the metric conversion table template to get the best benefits.

19+ Halloween Background Template for Your Holiday Event

Halloween is just around the corner so having the Halloween background template sounds like a great idea. Whether you want to create a flyer with Halloween theme or you want to make a Halloween card, the template can be a great accompaniment to your creative project. There are some ways for you to create Halloween-themed creations but why putting yourself into a trouble when you can have the easier way?


The Festive Holiday!

Halloween is one of the best (and exciting) events of the year. Imagine all the fun in the preparation and also the excitement during the day. Not only you will be surrounded by the scary but cute night creatures but you can also enjoy the tasty foods. Isn’t it fun when you can enjoy the ghost-themed cookies or the cupcakes with bat decorations? With the fun atmosphere and the creative appealing images, you can expect a lot of things from this Halloween celebration.

Choosing the Right Theme

So, what’s the deal about the Halloween background template, anyway?

  • First of all, you can create almost anything with the Halloween theme. Want to have a Halloween invitation? What about creating an announcement banner? What if you simply want to surround yourself with the Halloween theme, such as pumpkin images for the desktop or a wall decoration for your working station?
  • The background can be great for all kinds of things. If you are throwing a party, for instance, you can have the background and print it on a large scale for the party’s decoration. If your kids are into Halloween, you can also print some of the images and then let them have their own creative projects.

Getting the Images

Some people don’t really like the idea that they can use the Halloween background template. They prefer having their own creation and artwork. It mostly happens to those already having their own imagination in their head – they know what the scene will look like and they know what the details are all about. So, what should you do when you want to create your own background for Halloween?

  • Make use of the available apps or software. You can find free app such as Photoshop or Adobe.
  • Once you have the direct access to the software, explore around and learn the available features. What kind of image you want to create? Is it cartoonish? Is it comical? It is realistic? It is in lego-like style? There are different features for different kinds of effects.
  • Make sure that you have covered the entire space. That’s why it would be wise to plan the dimension and size from the start.
  • Once you are done, check what kind of options available for the saving. Some apps allow the images to be published, while some may cater to printing. Some may offer digital saving or even pdf saving.

It is up to you whether you want to make the background on your own or make use of the provided template. Just remember that the Halloween background template is meant to help you, so you know which best for you.

4+ Blood Sugar Chart Template Importance

You probably think that you don’t need any blood sugar chart, but such a thing will be different for those having diabetes or problems with their blood sugar level. It would be great if you can have a direct access to the template of the chart. So, what should you know about this chart and the template?


What Is the Blood Sugar Chart?

Also known as the blood glucose chart, this blood sugar chart helps you identify the ideal level of your blood sugar all through the day, and it includes moments before the meals and also after the meals. This kind of chart is generally used by doctors to monitor the diabetes treatment option and plan, as well as setting the target goal. This chart can also be used for self monitoring test blood sugar results and help people with their personal diabetes assessment. It may look like a simple chart but it holds a great functionality and use. It helps so much for diabetes management so you shouldn’t take it for granted.

The diabetes treatment plan is generally about maintaining the blood sugar level as normal as possible – that is, to keep it as close as possible to the target goal or normal level. Such a thing often involves doctor-ordered test and also at-home examination. The chart will help with the assessment and interpretation of the blood sugar results.


About the Chart in General

So, what should you know about this blood sugar chart, anyway? The sugar level report is generally written in mg/dL meaning that it is miligrams per deciliter – but in America. In England (as well as other countries), it is possibly written in mmol/L or milimoles per liter. The A1C recommendations are often accompanied within the blood sugar charts. The A1C results are often written both in percentage and mg/dL form. The A1C test will measure the sugar level in average within 3 months period – aimed to provide a wider view into one’s management.

The Guidelines

The blood sugar level may vary in different times of the day. For instance, it may be the lowest before the breakfast and the highest after meals. The target will be different, depending on the various factors, such as:

  • Health conditions
  • Any known heart (cardiovascular) diseases
  • Life expectancy and age
  • Problems with the body’s smallest arteries
  • The length that person has had the diabetes
  • Lifestyle and personal habits
  • Any damage (especially the known ones) happening to brain, blood vessels, kidneys, heart, or eyes
  • Stress
  • Any ailment or illness
  • Unawareness to the level of the low blood sugar

There are so many elements that you should consider and pay attention to. If you don’t really know how to make use of the chart, it is advisable that you talk to your doctor. Consult and discuss things thoroughly so you won’t be making mistakes when using the chart. It is also important that you consult to reliable and trusted sources – if you can find more than one credible source, it would be great. With the various blood sugar chart templates, you shouldn’t have any further problem.

20+ Free Certificate Template Important Elements

If you are working in the field or industry that requires you to produce different kinds of certificates of achievement or award certificate, having the right source of free certificate template will help you. A lot. Making the certificate isn’t exactly easy. You will need to have all the elements correctly and then there is the visual concern. In short, the certificate should be aesthetically pleasing as well as informative and satisfying.

The Different Kinds of Certificates

If you think that a certificate is merely a piece of paper with your name and your accomplishment, you are hugely mistaken. There are more to it – more than just the titles and the achievement. Whether you are dealing with teacher achievement award or student accomplishment skill, or even participation certificate, you need to know the elements to have in the document. For some people, creating the certificate from a scratch is overwhelming and time consuming – that’s why they are using the free certificate template to help them.

The Important Elements

So, what are the necessary elements in every certificate – in general?

  • The title, which is located on the top center of the document. The title acts as the main headline, providing information of what the certificate is about. It may be accompanied by the organization or institution giving the award. It can be Certificate of Completion or Tilham Elementary School Award for Math Contest Award of Participation
  • The presentation line. The format may be: This certification of award is presented on [the date] by [the giver] to [the recipient].
  • Recipient, which is the person, a group, or an organization getting the certificate
  • From, is the organization or person responsible for presenting the certificate
  • Description, which contains the reason for giving the certificate. It can be a short and simple statement or a longer paragraph with detailed description
  • Date, which shows when the certificate is given. It is generally spelled, such as the 30th day of May 2017 or the Third Day of February 2018
  • Signature, which represents the organization

Besides the important elements of content, there are also important elements for the free certificate template graphic.

  • Border. Although not all certificates have the border frame, it is the common and ordinary component. You can find such a border in most traditional form.
  • Logo. The organizations or institutions may include their signature images or logos. If it is a certificate for book club, it may use a book picture or if it is from a school, they may include their mascot.
  • Lines. Some certificates may have lines while others may have blank spaces. The lines are the guide for writing the description, name, signature, or date
  • Seal. It can be a real seal or the image of a seal

The Basic Consideration

If all of those things are overwhelming, you can always use the template. The templates usually already have the needed factors and elements, so you won’t have to break a sweat. With the free certificate template, you can always manage everything in the simplest and yet most attractive manner.


14+ Certificate Template Use and Creation

Have you ever checked the websites or sources providing the free certificate template? You’d be surprised knowing that there are so many different kinds of formats and styles of certificates. There are some general formats of the certificate while some are more specific and detailed. By getting the access to these templates, you can make adjustment and changes to the layout and design you like.

The Use of a Certificate

Certificates are used in many settings and situations. When you are joining a training and you have completed it, you get a certificate. When you are joining a short-term membership (such as a summer camp, a weight loss camp, etc), you get the certificate. When you have completed a certain education and training, such as completing a computer course, for instance, you get the certificate.

When you are responsible in making the certificate and manage it, the creation process can be overwhelming. It does take time and the extra efforts to create a professional outcome – and a visually appealing layout.

Creating a Template

If you don’t want to use the certificate template, you can always create it on your own. It is a good thing that we live in the modern era where there are different kinds of applications, software, or programs that help you with the arrangement. So, what should you do when you want to create a template?

  • Log into the software or program
  • In most cases, you should be able to see the options with various menu and options.
  • In the standard arrangement, you can choose Options and go with Configuration
  • You will be taken to the Template section. Choose Setup for starting out the process
  • Go with the option Create
  • You should see the page Manage Template. You should provide a name for it and then make use of the text editor to arrange the design
  • You need to come up with the arrangement of using tags. In most cases, the tags will be useful for finding and production. Fill in the required information. Once you have tagged them, click on the button Use and you are good to go. You can do it manually or electronically.
  • Once you are done, click Publish and you are good to go.

Using the Template

The problem with creating your own certificate is that you need to be familiar with the system, have the knowledge to operate the software, and have the creativity to design such a thing. If you are in a rush or you need to come up with a certain type of certificate right away, and yet you don’t really know how to manage the creation, why don’t use the free certificate template? It will save you time, energy, and efforts. The template is easy to download or save, and you can use it right away.

In the end, you can always consult the reliable sources of these templates. You are free to create the certificate by yourself or you can always make use of the templates. Just be sure that you find the reliable sources for the certificate template.

Free Newspaper Templates Stages in Use

It is nice to have a free newspaper template that can help you with your own skill development or with any project. If you want to be a newspaper editor someday, the template can help you hone your skills. If you get a school task making the newspaper, you can easily use the template to make the satisfying outcome. The template is designed for a purpose, and it is only logical if you make use of it by creating a work of your own.

Newspaper Templates and Their Usage

When you read the newspaper every day, have you ever thought about the difficulty in the layout process? Have you ever thought about the extra preparation and arrangement in making the news easy to read without having to cut any piece of information? Most people may never thought of such a thing but if you want to have a career in publishing, you should know that layout is pretty important.

Coming out with the right layout isn’t only needed in the newspaper or publishing industry, but in the entire artistic world. When you are able to come up with the appealing and visually interesting layout, the entire outcome will be interesting too. In the publishing world, the combination of appealing layout and complete news piece (without having to cut any of it for the sanctity of the information) will create a great outcome. So, you should make use of the free newspaper template and have a good practice.


The Stages in the Writing

When you produce a piece of a writing, the template isn’t only your way out to produce a satisfying outcome. You need to have a careful preparation from the beginning to the end. So, what should you do?

  • You need to come up with the idea and inspiration for the total production.
  • Make use of the planning sheet. Not many people realize this, but not all the templates can be automatically useful.
  • You need to collect the information and then organize everything in a neat manner. Having the information won’t be useful unless you arrange it in not only a well-arranged construction but also in an artistically appealing way.
  • Once you figure out how to make use of the planning sheet, you can start making use of the printed template. Sometimes, combining the two formats can produce an effective outcome – that will make the entire process easier.


Making Use of the Templates

So, how do you use the free newspaper template, anyway?

  • There should be a short note on each section. The note is about the content of the section
  • Consider the needed space for the writing. Some sections may need longer section while some shorter one.
  • Each section should have different marks of how much content should be included in it.
  • The entire process can help making everything easier

It may take an extra time to get used to everything but if you are able to adopt the free newspaper template into your newspaper writing and planning, the result can be perfect.

11+ Newspaper Template Usage and Functions

Having different kinds of templates can be quite handy and fun, including the newspaper template. The template can be quite fun and adjustable, especially when you want to tweak it around. Although the template is generally used for projects or works, it can also be used for general use and casual activities. Let’s say that you are thinking about becoming a newspaper editor one day. Getting familiar with the template from the early time can provide an additional insight and knowledge.

The Different Kinds of Templates

Not many people know that there are different styles and options for the newspaper template. If you check some of the websites providing the free templates, you will see that they have different kinds of formats and arrangements. The regular one is the A4 but you can also find the landscape format, which is great for the broadsheet style.

There are different kinds of styles as well as sizes and dimensions available for the templates. If you check the templates in the further details, you will also see that the inner layouts can be different. Depending on your needs, you can choose whichever template that you want and come up with your own design.

Choosing Your Own Templates

So, how do you get the ideal template for your needs?

  • Go to the source websites. Explore around and see the various options available.
  • If the website has a quite big collections, they may divide the categories based on the design and styles. You may want to look into the options
  • Once you have found the section for the newspaper template, you can see the various options and styles. In most cases, the templates are coming with squares for the written text and also sections for the image.
  • Make sure that you have read the sections for the regulations and rules. Can you download it? Can you save it with any format that you like? It is downloadable only or you can both download and print it? Find out about that information thoroughly.

Other Things to Consider

Even after you have found the reliable source for your templates, keep these things in mind:

  • You want to have a flexible and adjustable template. You want a template that can be easily tweaked and changed – not the ones set in a fix manner. You want to choose something that you can adjust to your needs.
  • What’s the use of the template if you have never used it? Once you have downloaded or saved the template, it would be a good idea to start implementing it – or to use it. If you have a written material, try it to make it into a useful layout – as if you were making your own printed form.

In the end, the template should be used for a mean of practice. There is no use of having it in your folder and never use it at all. Bookmarking the website can also be a good way to get your access to the newspaper template and their collections.