Template Business PSD, Excel, Word, PDF

20+ Eye Drawing Template How to and Tips

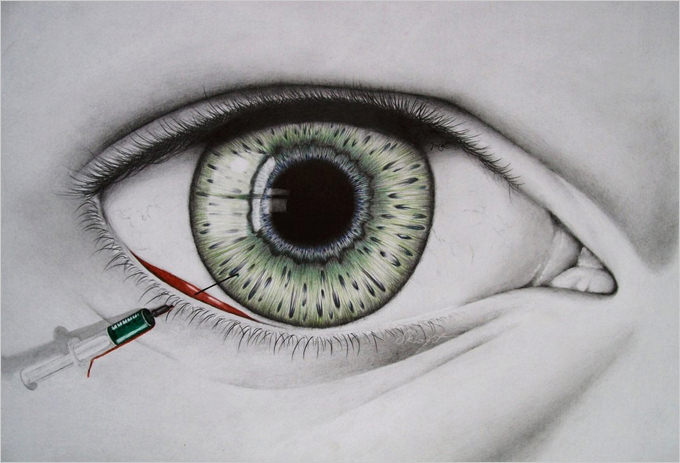
In case you haven’t noticed it, making the eye drawing isn’t exactly easy. Making the eyes isn’t difficult but making it look real and alive is another different point. Although you can always learn about making the realistic eye, it doesn’t hurt to get the access to the eye templates. By doing so, you can have an easy arrangement and implementation without breaking a sweat.

The Use of Templates

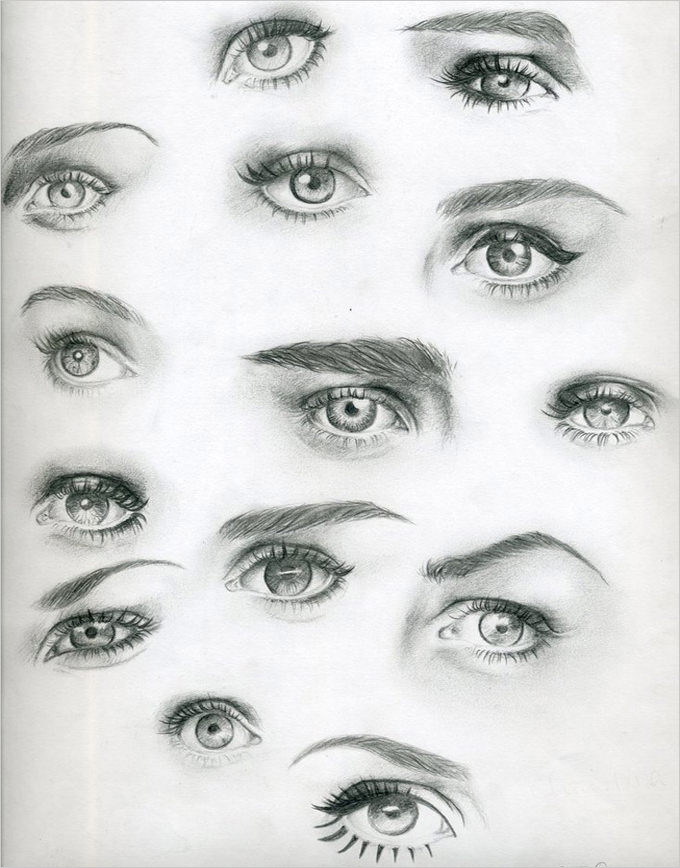
The eye drawing templates can be handy when you want to learn how to do it properly at the right pace – and make some drawing on your own. Unless you are completely talented or gifted, making the eye requires time and process. If you have to make an artistic production and yet you haven’t mastered the skill, the templates can be super handy.

For the learning process and development, a lot of people learn this process by themselves. They use the template as the guidance and then they learn how to manage everything on their own. Of course, it would be helpful if you can get some useful tips and insights about how to do everything correctly and properly.

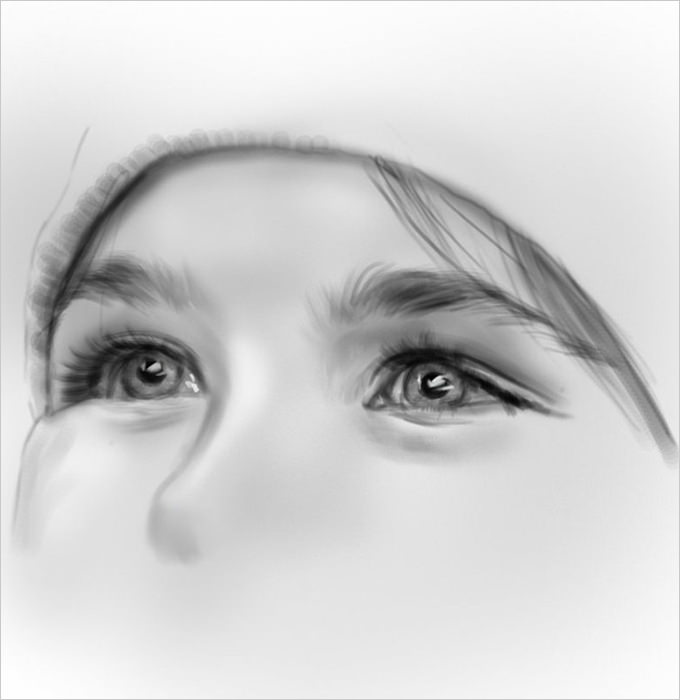
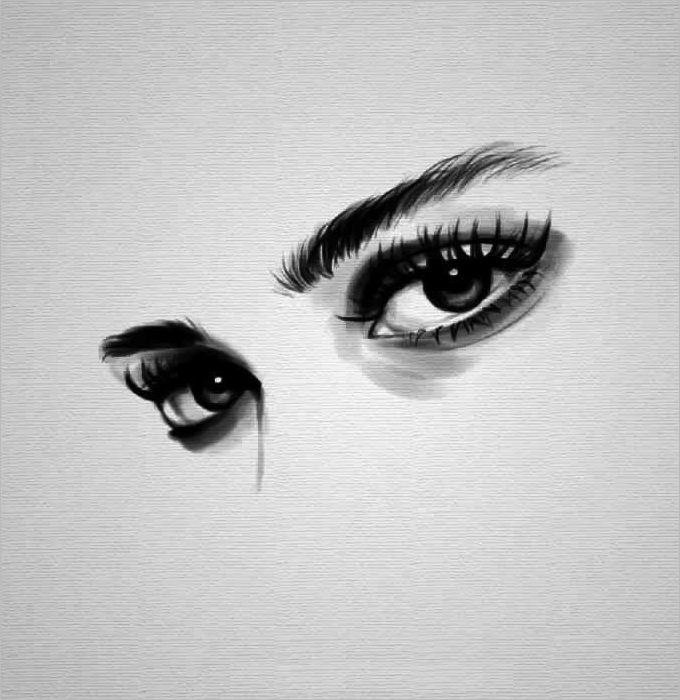
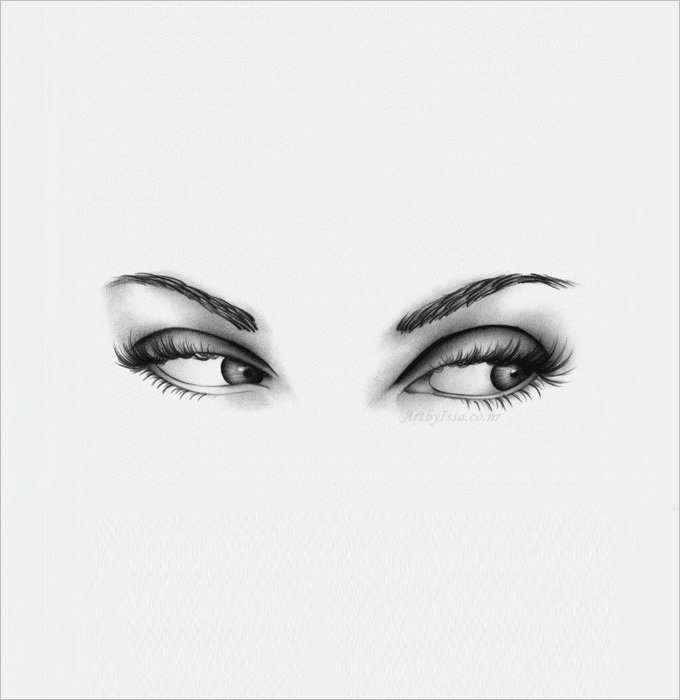
First of all, forget about getting yourself too ambitious. If you want to master the eye drawing technique properly, start with one eye only, instead of the two eyes. As your skills develop, you can have a pair and the matching proportion. But until then, you want to start with one eye.

How to manage the steps?

  • Think about the angle. The shape of the eye from the front will be different when it is viewed from the side. The dimension and the arrangement of each part will be different from one thing to another. Think about this perspective if you want to create a realistic result
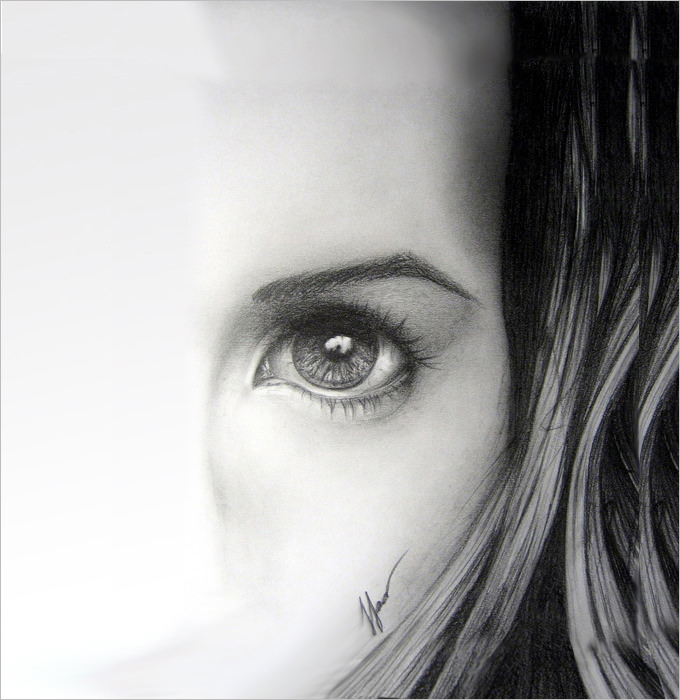
  • Don’t forget about the anatomy of the surrounding parts. The face muscles and bones will determine the quality of your eyes. The eye socket shape and the muscle band surrounding eye will help making the result real
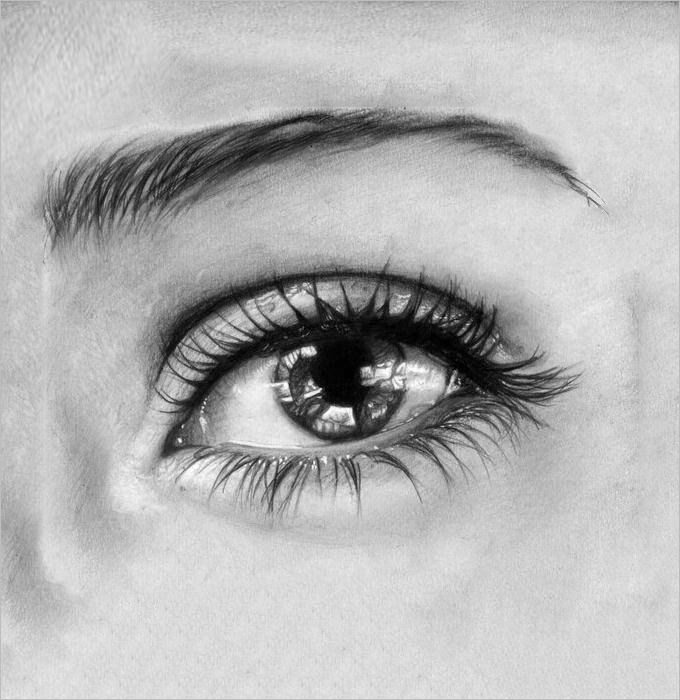
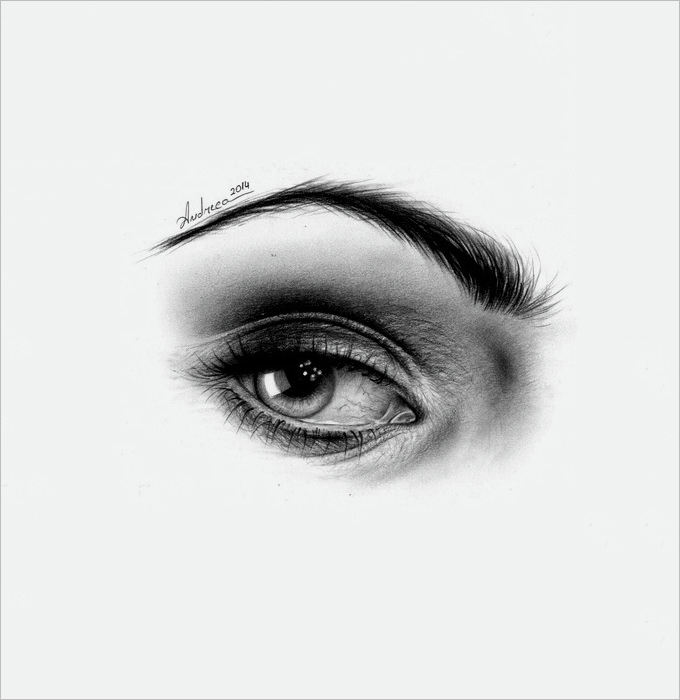
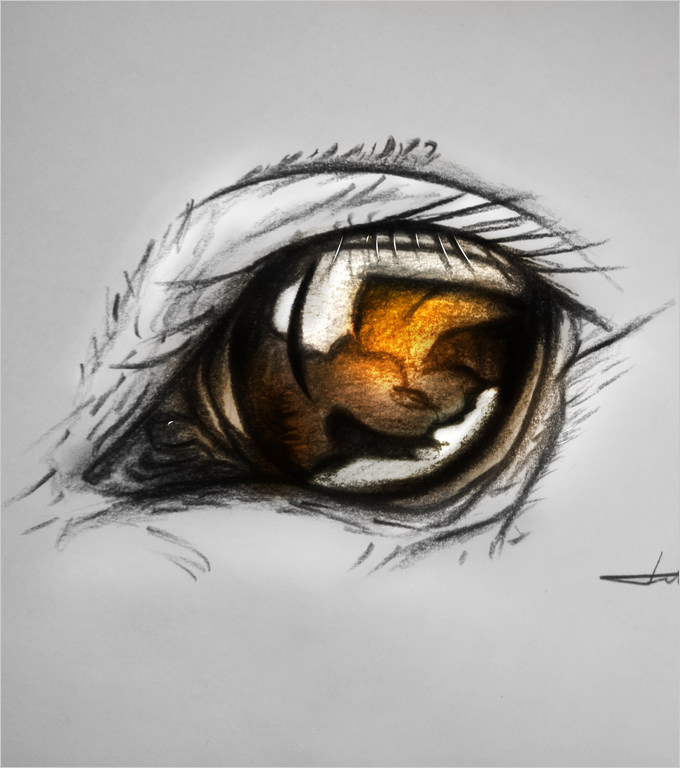
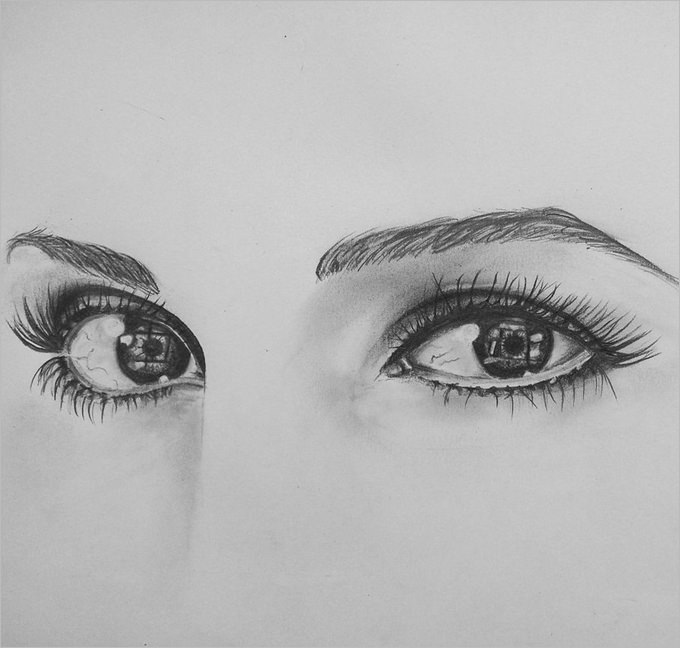
  • If you want to create a realistic result, you need to observe the subject very closely and in details. That’s why it would help to take a picture of the eye and have a close-up image. Learn about the image in details and then you can practice making the drawing

Some Handy Tips

Here are some handy and useful tips in making the result.

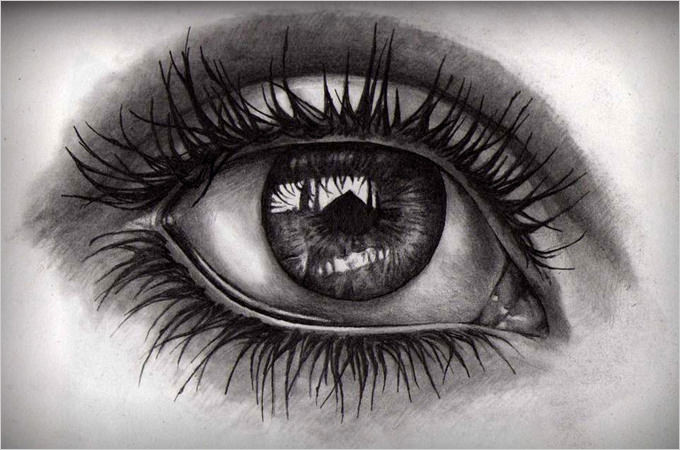
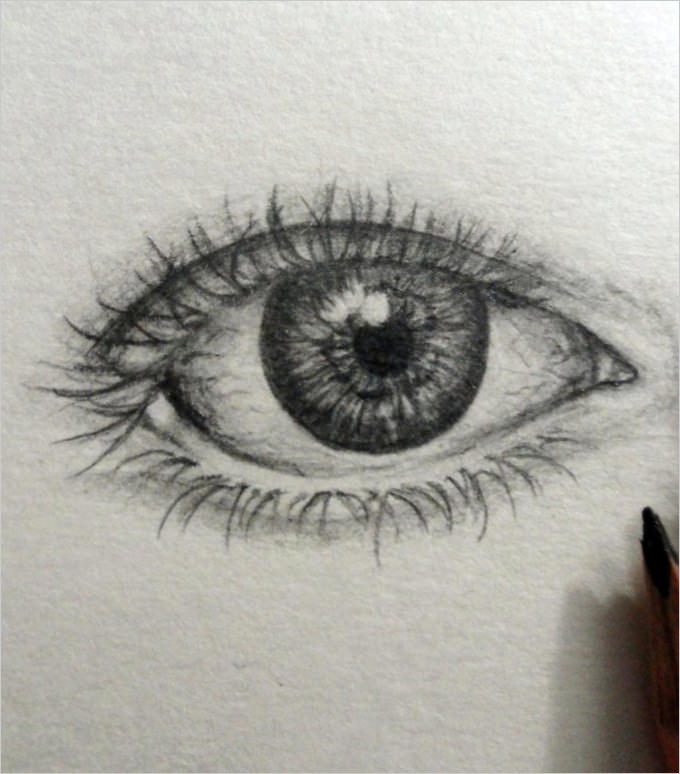
  • Completely draw what you see. When you take an example from a photo, it would be great if you can draw everything in detail.
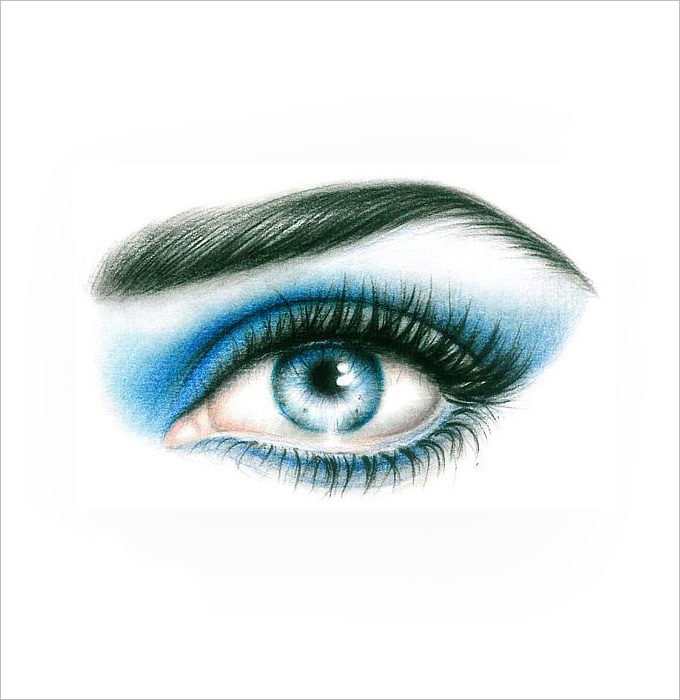
  • You may also want to learn about highlights and shadowing. It will help with your drawing
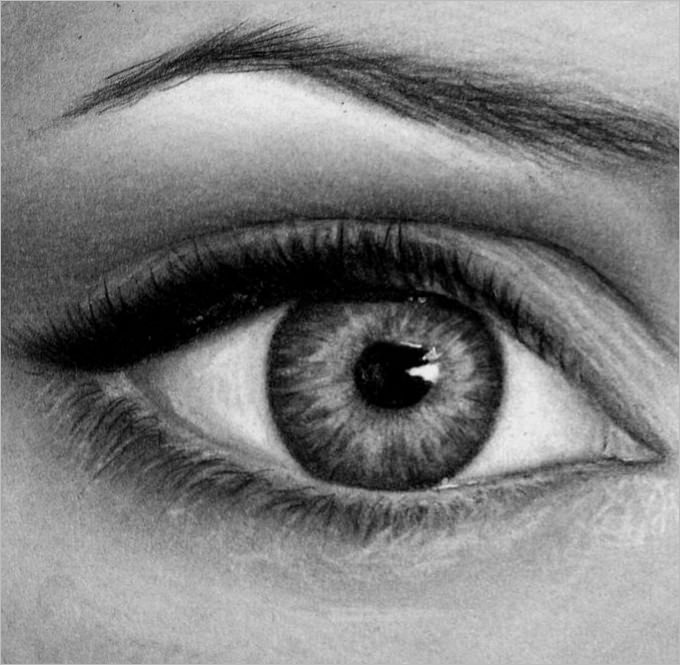
  • Don’t outline the bottom lid automatically because it only needs lightly indicated after the highlighted lower rim
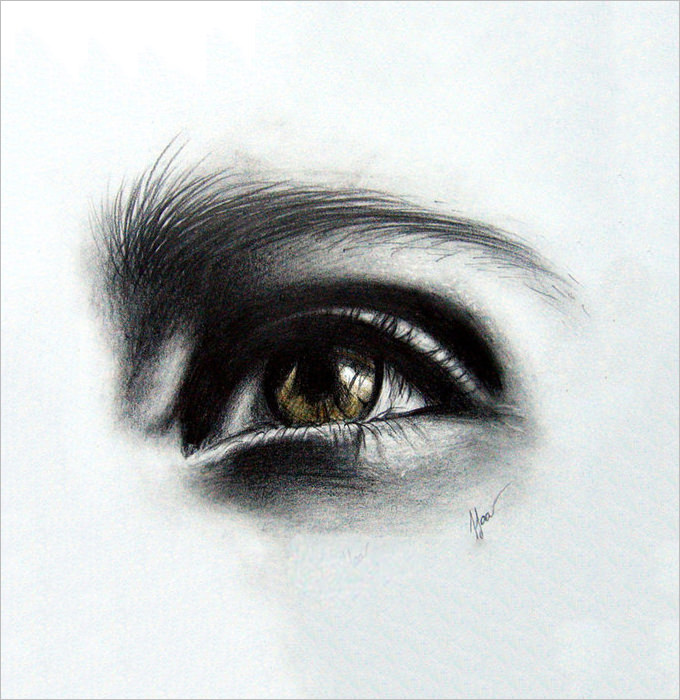
  • When making the eye socket, draw the tone’s subtle change, including the planes of brows and nose. It will help setting the eyes to the face.

Having too many theories can be confusing, so why don’t you try it for yourself? While practicing the eye drawing process, you can enjoy the process too.

16+ Chalkboard Bakcground Template Artistic Appeal

Whether you are creating your own version of a birthday card or you are thinking about an artistic flyer for your business, having the chalkboard background can create a unique sense that you won’t find from other craft. There is a sense of old-school and traditional with the chalkboard design, and if you can include one in your design in the proper way, you can improve its artistic value.

The Chalkboard Background Design

Nothing beats the traditional sense of a black (or green) board and the white chalk letters. In the past, such a design was only familiar for students, but its function and role have developed greatly ever since. Right now, you can find such chalkboard design almost anywhere – from the promotional flyers or brochures to digital advertisements. Most people love this chalkboard background dearly because it takes them to the childhood memory. That’s why marketing people still use this kind of design because they know that it has a strong appeal. When you include it in your visual advertisement, it is almost a guarantee that yours will stand out.

How to Make the Style

If you are willing to spend some time in the design and you have basic Photoshop ability, you can always make one by yourself. Here are the stages:

  • Open the chalkboard background or image
  • Pick the matching font. Since you are going to use the chalkboard background, it is logical to pick chalk as the letters.
  • Add the overlay texture to the text. Click on Layer, and then Layer Style, and finally Pattern Overlay
  • Go with parchment or crumpled paper style. And then change the opacity to light.
  • Now you want to make the overall text look a bit grainy. You will need to set the noise. You want to choose Rasterize, then Filter, and choose Noise, and Add Noise.
  • Add the texture to your font so it will resemble the chalk or brush strokes
  • Choose the erasers and set the opacity to less than 30%. Swipe it through the text in various places. Do it until you see the result that you like.
  • Add the swipes to your background and have more texture for your font.

Basically, you can change it into various styles, patterns, and models that you like. The key is that you are practicing it with different textures and models and you should be able to get various outcomes to like.

The Templates

If you don’t really want to break a sweat in making the design, you can always make use of the available templates. There are different sources that you can use as the sources of your design. You can download, save, or print those templates to your like. If you have gained the reliable sources, downloading or saving those templates will be easy.

In the end, the decision to choose the template or create your own depends on your personal preference. Whatever activity that you want to have, be sure that you are making the right decision. After all, the chalkboard background can be useful for many creative projects and outcome.

20+ Flower Drawing Template, Effects of Flowers and Tips in Drawing One

When you are making an artistic creation or you are into craft activities, the flower drawing can add the artistic appeal to your creation. You have to admit that flowers are always making things interesting. They can create various effect and outcomes. They are beautiful, flexible, and soothing. So, what’s so special about the flowers, anyway?

Flowers and Mental Health

You may not know this, but the flower drawing can affect people’s mental health and wellbeing. There are some basic perks of the flower:

  • They are related to the happiness. Based on many health studies, flowers can invoke excitement. Whether you are getting flowers or see the image of flowers, there are positive reactions that often follow. They are gratitude, happiness, and surprise.
  • Flowers have a direct impact to the mood, especially the positive one. People who are exposed to flower images or real flowers are often feeling more positive. They are less agitated, less anxious and less depressed. They also show greater outcome toward life satisfaction
  • Flowers are often connected to intimacy and positivity. When you surround yourself with the flower images, you can have a better (and greater) life satisfaction.

How to Draw Flowers

So, how do you draw a flower?

  • First of all, you may want to use a real model (meaning, a real flower) for your subject. It is advisable that you take a picture of the flower so you can capture it on the most perfect moment. Flowers wither or wilt, and different angles or lights can create different effect.
  • Make sure that your subject has the detailed description and lines, so you shouldn’t have any problem with the drawing.
  • Don’t forget to choose the right paper. When you are doing an ink drawing, the watercolor heavyweight paper is the best. In short, you don’t want the ink to bleed too much to the papers’ fibers. You may want to test the paper first.
  • The different types of paper will create a different effect. Creamy paper may look warmer while a white one will create a crisp effect.
  • Choose a paper with smooth surface in the event you are using a hard tip draft pen.
  • If you are a beginner, you may want to choose a pencil first for the light sketch. The ink line can be done later to bold everything. If you are advanced (and you are pretty confident with the pen), using the pen or ink right away is always possible.
  • Sketch the outline first if you aren’t sure with the overall effect and line.

In the end, the flower drawing can be quite good for almost everything – artistic work, decorative elements, and so much more. With so many positive effect and desired outcome, it is understandable why people are into the flowery images so much.

Making use of the template is always possible. You can always save the template or you can print it right away. It is always a good idea to choose a reliable source that can offer you various examples and designs. With the flower drawing template, you don’t have to draw the flowers from the scratch.

7+ Receipt Template and How to Create a Professional One

You probably don’t understand the importance of the receipt template unless you have a business of your own. Creating your own template can be quite stressful and difficult. Creating a simple receipt is basically easy but it will be a different matter when you want to create a professional one. Of course, there are several alternatives on how you can create such a thing, and it would be interesting to see each option.

The Function of a Receipt

A receipt is basically a written document confirming a business agreement or transaction between two different parties. The receipt is generally the document that signals that both party A and B are working together and they have agreed to conduct the transaction, which results in the invoice, or billing, or receipt of those parties.

You can find such receipt template easily – and they are available in various forms and formats. You can find the templates for Words and also Excel. Some people are into Excel so much while some prefer the Words. Depending on your personal like and preference, you can freely choose your own favorite template.

Use the Template

When you are using the receipt template, you don’t need to create anything from a scratch. Simply use the template (mostly, you can download them) and save them in your device. Whenever you need to bill someone or to send someone the invoice, you only need to use the template. With the template, you only need to fill in the required information, print it out, and you are done. It’s pretty simple, right?

Use the Receipt Maker

Another option that you can have is to use the receipt maker. It is a special program or software that you can use depending on your needs. Some of these programs are pretty flexible and easy to use. They are also free – although some of them may charge you. So, how do you use the maker?

  • Log in or get the access to the software.
  • Follow the directions. Some software even allow you to do some adjustments and tweaks. You can even include your personal business logo or such thing alike.
  • Once you have tweaked everything, you can preview the result.
  • If you are sure with the quality of the outcome, you can print it out or you can save it digitally. If you can’t save it digitally, but you can only print it out, don’t forget to make copies of it and save them all in a special folder.

Handy Tips

When you are about to create the receipt, remember these things:

  • Be sure to be transparent, including about the calculation. Money is a sensitive matter so you want to be sure that everything is transparent
  • Be detailed. What are the products? How many items? What kind of service do you deliver? How many hours have you put into the work? How is the management of the work?
  • Put yourself in your customers’ or clients’ shoes. What kind of information do you want to see when you see the invoice or receipt? How detailed do you want it to be?
  • You can make use of the receipt template – and if possible, make some adjustments that meet your requirements.

8+ Graph Paper Template Printable Many Usages

The graph paper printable can help you manage your drawing in the easiest and simplest manner. Although the paper is often associated with math, the special paper can be used in various kinds of activities. It can be used for craft projects as well as many home projects. That’s why you shouldn’t underestimate the use of the paper – not after you have learned about its functionality and perks.

The Functions of the Paper

As it was mentioned before, the graph paper is mostly used for mathematical graphing. If you take math class, you know how important the graphics are. This kind of paper is most common for calculus and statistics. You probably think that you can only buy the paper, but you can always print them out these days. With the (often free) graph paper printable, your math activities will be easier. But you can also use it for other usages and needs.

What are the other functions of the graph paper?

  • First of all, craft activities can be made and created with the paper. Poster boards, for instance, can be made with the help of the lines. In most cases, the users will find it easier to make use of the lines and grid, so they can make a centered creation. The grid also helps them to complete the whole thing.
  • The scale can be personalized. Depending on the sizes and the requirements of your projects, you can scale down or scale up.
  • The graph paper printable is often used by home developers or designers. The grid on the papers will make the planning easier. Let’s say that you are planning a room remodeling or renovation, the paper can help better with the scaling. It is completely handy to avoid making costly mistakes. The grid on the paper is also helpful when you want to add the furniture, the overall dimension, and other things.
  • The paper is handy when you are trying to plan a landscaping project. Whether you include the plants, the trees, and the bushes, the paper can help you accomplish such a satisfying outcome.
  • The paper is super handy when you want to present a statistic chart. Whether you have an important presentation or when you want to describe something in details, such a paper can be helpful.

How to Use the Paper

Let’s say that you want to draw something – a table in the living room or a desk lamp. How do you manage such a thing on the graph paper?

  • You need to choose the right graph paper. There are different kinds of papers with different sizes and scales. Choose which one that you like the most
  • Once everything has been done in the grid, you can start from the left up corner or area. You can go to the right or down. If you go to the right first, finish that upper area first and then go down. If you go down first, then continue with the upper to the right, followed by the bottom to the right.

That’s the basic and general use of the graph paper printable.

11+ Family Tree Template and Tracking Your History to the Past

You probably don’t know that there are tons of different family tree templates available for different purposes. In most cases, people only know the tree-like branches where you can find the youngest and most current family members on the bottom. However, if you check some of the most reliable sources, you will see that there are so many different forms and shapes and also constructions of the family tree. And you can make use of it to your best advantage – but only if you know how.

The Function of a Family Tree

So, what is the function of the family tree, anyway? You can learn about your ancestors and the line trace of your family’s history. It can be interesting – and also fascinating – to learn how far your family has gone down. Let’s say that you have a family tree that traced back to the 1650s. Isn’t it interesting to see the names, and probably google out about them? It would be great if your great-great-great-great grandfather turned out to be an important figure in the past or your great-great-great grandmother was a pioneer in something cook.

How to Construct the Family Tree

Constructing the family tree isn’t easy but it isn’t impossible either. Besides using the family tree templates, you need to trace your family. But how do you do it?

  • Start from a certain point. A surname or the male line can be a good starting point.
  • Use a special software. You may not know this, but there is a handy and special genealogy software that can help the trace easier. It can be done electronically and digitally so you shouldn’t do everything manually. Even if you ask around your relatives (close aunts or far uncles), you may only be able to reveal several generations. But with the software, everything can be easier.
  • Do the research for your lineage. Be advised that this step is tiring and it requires a dedicated time, the determination, and also the passion to do such a thing. You can do this on your spare time but then again, it takes a strong will and dedication.
  • Be patient. Unrevealing something that has passed down for generations, even for centuries, isn’t something easy. You may fail on several attempts. Don’t be discouraged and be patient. Once you are able to do so, you may find out some surprising facts about your ancestors and lineage.

Choosing the Template

So, which of the family tree templates should you choose? When it comes to choosing the right template, there is no right or wrong. You can choose whatever template that you like with any visual design that you want. What’s important is that you choose the reliable source that won’t cause you any problem in the future. You don’t want to choose any shady source that will only compromise your online activity and also hardware use.

In the end, the family tree can help you trace your ancestry line to the past. If you are determine and passionate about doing the research, you won’t have any problems with the family tree templates.

12+ Storyboard Template Functions and Tips

If you are working in the creative and artistic industry, knowing your best sources for reliable storyboard template can make your job easier. The storyboard is often used in video productions – whether it is the sales video, a training one, or a demo video. The storyboard is a part of the planning – and every creative individual understands how important the planning stage is.

Understanding Storyboard

Before you explore the many storyboard template types, it is best to know what a storyboard is. It is basically the graphic representation that shows how the video will be shot. The storyboard usually comes in the form of squares with pictures or illustrations that represents each shooting stage. The easier version is: think of the storyboard as a comic book of how the video will go.

There are reasons why creative people usually need the storyboard.

  • The storyboard has become one of the best options or ways to share the planning or vision. Instead of you having to explain everything to the audience – and there is no guarantee that they will get it – isn’t it better if you can have a visual assistance? In this way, you can easily share and then explain your thoughts and also vision. With the storyboard, it will be easier for the audience to get the clearer picture and get your point.
  • The storyboard will make the production easier. The storyboard lays out the plan of how the production should run. It has all the shots and how the scriptwill interact with the visuals. It can cover all the angles and point of views. With it, producing the videos will be a lot easier.
  • The storyboard helps you save time and create an effective result. Sure, you may have to spend the extra efforts to arrange the storyboard. However, it is super helpful in the long run because it can prevent you from making mistakes and revisions.

How to Make the Storyboard

Let’s say that you don’t really want to use the storyboard template and you decide to make one for yourself. So, how do you do it?

  • You need to create black space or slides. You can do it by creating squares (if you see the templates, you know what I’m talking about). The squares are representing the frames, so each different square will represent the different frames. Just make sure that you have enough space within each square.
  • Add the script. Once you are done with the picture, you can write the lines. Think of a comic book and you know what to do with the storyboard.
  • Sketch the story. You don’t have to be detailed but you need to lay out how each of the scenes should look like. What’s important is only the visual details that can help the audience understand your video.

What’s important is that you are trying to convey a message. Put yourself in your audience’s shoes. Can you understand the storyboard? Is everything clear? Do you know what to expect? If creating your own storyboard is overwhelming, you can use the storyboard template that can be found in many reliable sources.

15+ Sad Emoji Template, Emojis Development and Appropriate Usage

Among the many types of emojis being used in chat lines and conversations, sad emoji is one of the most popular. Happy, sad, and laugh emojis are the most usable types of emojis often used in the digital conversations. That’s why more and more people are interested in having the template. Right now, the use of emoji has developed and it has been even used in formal documents. Such a thing has caused a controversy – some people say it’s okay while some disagree. So, how should you stand in such a debate?

The Popularity of Emojis

Let’s face it, we are living in the modern era where chatting lines and written forms have become so common. Text messages, social medias, and chat lines are mostly using written form. The emojis are liked because it represents our facial features. When you are writing, there is a lack of emotion in this type of communication. When the emoji was created and used, it is considered enough to make the written communication more humane and alive. And among the many popular emojis, the sad emoji is one of the most used one.

The Different Types of Emojis

You probably think that you can always download the emoji collections or templates and use them. The process to find them and then download them is pretty easy, but do you know that there are different kinds of formats and shapes, depending on the type of devices you are using? The sad face on Google Windows is different from Samsung Galaxy S7. On Apple iOS, the emojis are different from Twemoji Twitter.

How to Use the Emojis

Although the emojis are mostly used in conversations in chatting lines, the use has developed to printed documents. Some newspapers have even used the emojis on the headlines – sad emoji is used for sad news while happy face is used for positive news. Some people argue that the use of emoji to printed paper isn’t right because it creates a bias in the readers’ opinion. Not to mention that the emojis are supposed to be used for casual use – not formal one.

So, how do you properly use the emojis?

  • When you are chatting with your friends or family members that are close to you. Avoid using the emojis for far relatives or your boss. No matter how close your relationship with your boss, they are still your boss.
  • In a formal email. Whether you are corresponding to other business partners or with other colleagues, you are still in the professional setting. The emojis are supposed to be used in casual situation with friends or people that are considered ‘equal’ to you. No matter how much you want to express yourself, the written words alone will be enough. Ditch the emojis.
  • When expressing condolences or grief. This is the situation where the emojis are no-no. When you want to break up with someone, don’t use the emojis. If you are thinking about using the sad emoji, it would be highly considered inappropriate and bordering impolite.

Youtube Banner Templates and How to Make One

Using the Youtube banner template will help you so much in managing your Youtube account and making sure that you have the right way to improve your channel. You probably think that the banner isn’t important but in the website world, such a thing is super crucial. The banner will be the media to attract visitors and (hopefully leading to) subscribers. If you can’t really make one yourself, you simply use the template.

The Function of the Banner

As it was mentioned before, the banner is like the storefront of your website. It is the thing that will attract your visitors and encourage them to explore deeper into your site. If you use simple and plain banner, it is most likely that visitors won’t even look twice to your site and pass it. But if you manage to create such a visually appealing banner (if possible, including some of the unique and signature styles of yours), you can make people stop for while and intrigue them to stop by. If they like the design, they will be curious and want to explore further. That’s the correlation of appealing banner and the increase of the visitors.

Using the Maker

Although you can always make use of the Youtube banner template, you can also make one for yourself. Some creative people who are already familiar with everything may choose this path. They don’t want to use the templates because it is too ‘generic’ for them. They want to express themselves and create something unique – something that represents their style and even the contents of the channel. If you are super creative, you can use the banner maker.

So, how do you use the maker, anyway?

  • Find online maker that can be used freely without you having to spend a dime
  • Follow the instructions. In most cases, those makers have already been designed with easy features. You only need to click or drag and drop to manage the layout
  • Once you are done, your banner is ready to use. Follow the instructions and your channel will look new.

Using the Templates

The banner is easy to use but not everyone is able to tweak the system. You can use the templates if you can’t operate the maker. How do you use the templates?

  • Do the online search. You will come across some websites providing the templates. They are mostly free and easy to download.
  • You may see many options for the Youtube banner template. Simply choose which one you like the most and manage the system.
  • Once you are done with the templates, your banner is ready to set. Again, follow the directions for installation and use. Your Youtube channel will be looking new and fresh.

Finding reliable sources is easy. You want to consult the websites with clear layout and instructions. They don’t contain gibberish words and they look legit. It would be great if you can read several reviews first so you know which websites are trusted. That’s how you use and manage the Youtube banner template for your own benefits.

5+ Sample Correction Officer Job Description Template Important Elements

It would be great to have some sample correction officer job description because not everyone is familiar with such a thing. In fact, written documents are often underestimated while in fact, they are holding a quite important role in the business world and professional industry. You probably don’t think about having such a guidance format for the job description.

About Correctional Officer

Correctional officer is a part of the law enforcement community. They should be educated and well trained because dealing with inmates isn’t easy. The officers are mostly working in local, state, or federal prisons or jails with different responsibilities and workload. Some of them may be responsible for inspecting the overall facilities while others may be responsible for enforcing discipline. Others may be responsible for supervising, monitoring, and transporting the prisoners while doing their everyday activities.

Although the sample correction officer job description may not state it, you should know from very early that the job isn’t easy – it is even dangerous and stressful. You need to have the patience, good manners, and strict conduct to do the job. Depending on the agencies, a correctional officer should at least graduate from high school. Some agencies, though, may prefer at least college courses (or even degree), military training, or law enforcement background. You need to check the job description as well as the requirements.

How to Write One

So, where should you start with the description?

  • First of all, you need the title, which includes experience level, special requirements, and also general term. For instance, you need to write ‘Senior Correctional Officer’ or ‘Juvenile Correctional Officer’ or ‘Corrections Agent’.
  • Afterward, it should include the summary of the job, such as ‘working experience in rehabilitative environment is the priority.’ Or you can also say ‘candidates who are able to work together in a team for 17 hours.’
  • After the summary, it is followed by general duties and responsibilities, like ‘help other officers dealing with inmate management’ or ‘escort the inmates to the job sites.’

The Reasons to Have the Sample

Here are two major reasons to have the example format:

  • Let’s say that you are working in the HRD and you want to post a vacancy for the job. The description should clearly describe the responsibility of the officer as well as the location of the job. There are vacancies in federal prisons – which generally are bigger than the local prisons; thus, requiring people with more complex skills and experience. It’s a good thing that there are different kinds of sample correction officer job description – for the local areas or federal setting. There are also detailed descriptions as well as the general one.
  • The sample format will give you information and insight of the structure and the needed requirements for candidates. If you have never made any description format before, no need to get a headache. Simply consult the sample and you will be able to come up with the right format.

There are many sources for the sample work description, especially for correctional officers. Find the ones with reliable sources of sample correction officer job description.